0.00 $
Step By Step, DooHickey Club Magazine
In our first issue of the new Magnolia DooHickey Club Magazine, we had a Step by step that wouldn’t “fit” entirely. So we decided to put the complete version here on our blog. Hope You like it and feel free to comment whether we should put more Step by steps on our blog?
Summer Butterflies Wedding – DooHickey’s Cake, by Yuri
*All the flowers for this cake are made by using Magnolia Doohickey’s dies.
1. First, make a three-tiered cake base.
You will need: card stock, circle dies, scallop circle dies, glue, double-sided tape
Cut out base pieces.
Base circle (2 pieces each): 2 3/4, 3 and 3 3/4” circles
Base strip (1 piece each): 9 1/4×3, 10 1/4×3 and 12×3”
Cover circle (1 piece each): 2 3/4, 3 and 3 3/4” scallop circle
Cover strip (1 piece each): 9 1/4×2, 10 1/4×2 and 12×2”

1
2. Fold the base strips on 1/2 and 2 1/2” on the shorter side. Cut with scissors on both sides as shown in the picture.
Glue the base strip around the base circle. Glue the other base circle to the top.

2
3. Glue the cover strip around the cake base.

3
4. Glue the cover circle on the top.
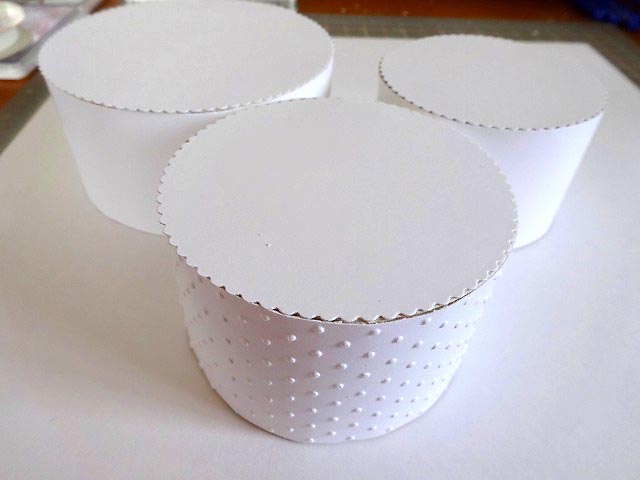
4
5. Make the ornaments for the cake.
DooHickey’s dies you will need: Lace Coaster, Tilda Doily and Vintage Box Lacing Coffee.

5
6. Glue the die-cut Tilda Doily to the bottom of the largest cake, and Lace coaster on top of it.
Glue the die-cut Vintage Box Lacing Coffee to the first and third tiers.

6
7. Make paper flowers for the cake.
First, make peonies. Die cut Doohickey’s Peony Petals and Vintage Daisies large.
To create the peony you will need: 2 peony petals and 2 Vintage Daisies.
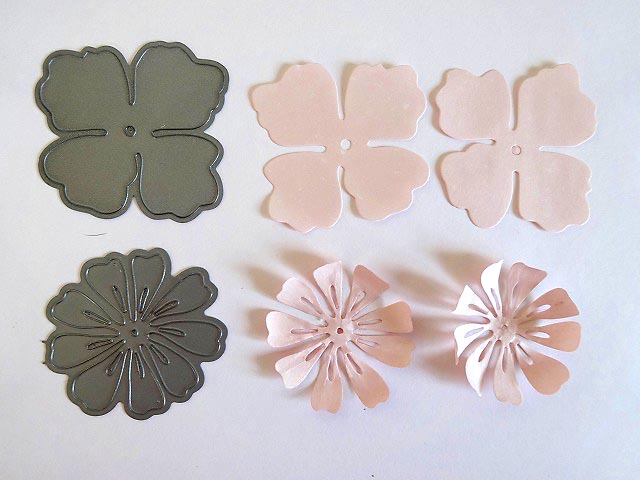
7
8. Color the paper according to your taste. (I used Mini Mister with water and Distress Ink re-inker.)
Curl each petal by using a rounded stick.

8
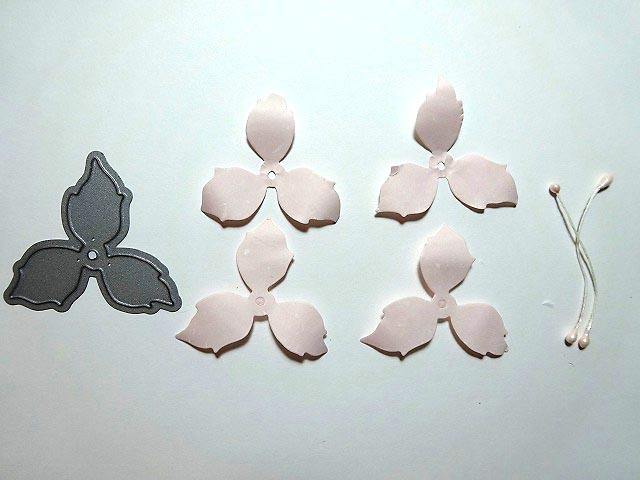
9. Cut off and separate one peony petal into four parts as shown in the picture.
9
10. Use a foam mat and an embossing tool to curl each petal.

10
11. Make a little slit in each petal with scissors.

11
12. Glue the two bottom tabs together.

12
13. Stack and glue all petals like this.

13
14. Make four peonies.

14
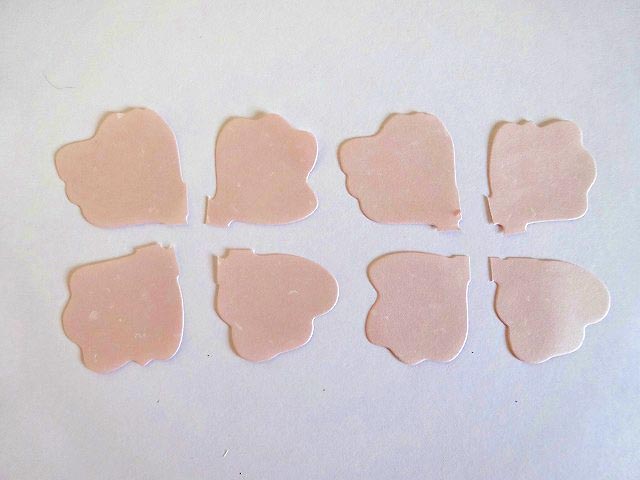
15. Next, make roses. Die cut Doohickey’s Peony Petals.
To create the rose you will need: 4 peony petals

15
16. Cut off and separate one petal into four parts, and make a slit in the other two petals.

16
17. Then paste the slit ends together as shown in the picture.
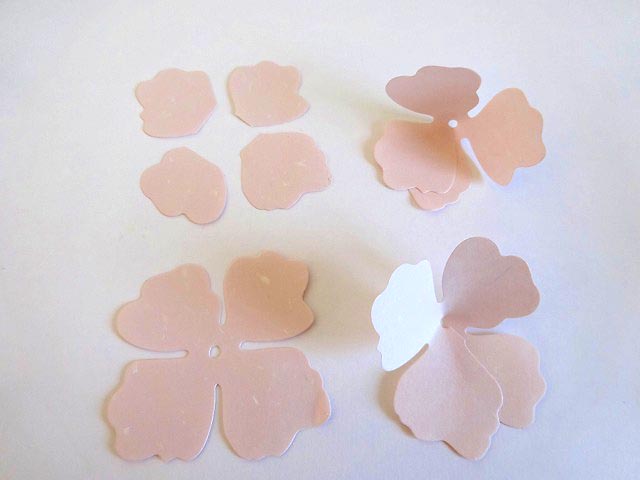
17
18. Curl each petal using the edge of scissors.
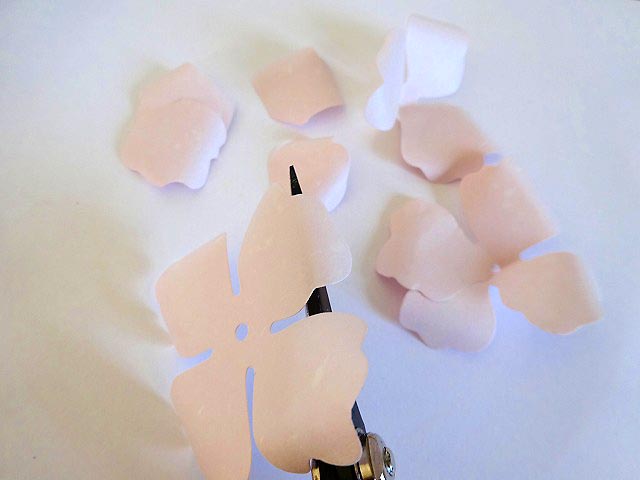
18
19. Wind one petal around a bamboo stick and paste it with a glue gun.

19
20. Paste four petals on it in the same way.

20
21. Remove the bamboo stick carefully from the petals, and paste it to the other petal.

21
22. Paste the other petals and form them in good shape.

22
23. Repeat the steps above to make three roses.
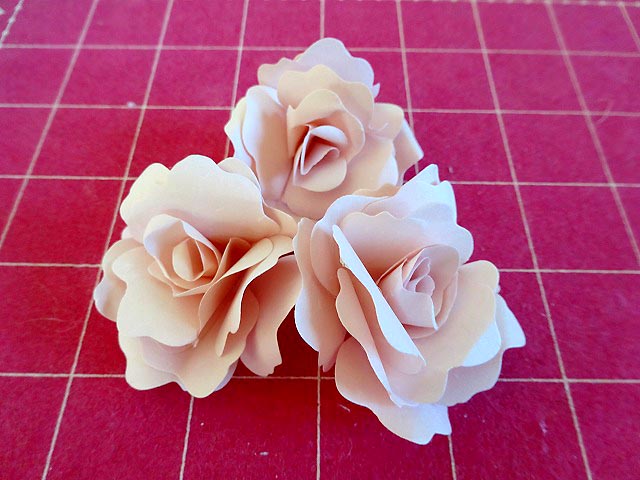
23
24. Next, make lilies. Die cut Doohickey’s Poinsettia large.
To create the lily you will need: 4 peony petals, stamens.
24
25. Curl each petal with the edge of scissors.

25
26. Make a dent in the center of the flower with a form mat and an embossing tool to give it a three-dimensional effect.

26
27. Put stamens through the petals and glue them. Repeat the steps above to make three lilies.

27
28. Make seven tiny flowers with DooHickey’s Hellebores dies.

28
Make butterfly cake topper:
1. You will need: DooHickey’s Swirly Butterfly, half pearls, metal wire, glue gun, round stick.

1
2. Wind some wire around the round stick.

2
3. Glue the end of the wire to the backside of the butterfly.

3
4. Finally you can decorate the cake now!
To decorate the cake you will need: 3 lilies, 3 roses, 4 peonies, 3 rose leaves( make with DooHickey’s Rose Leaf), 1 butterfly topper, 1 butterfly, 5-7 tiny flowers, ribbon, lace, pearl trim, half pearls, pearl stems, berries, glue.

4
5. Stack the covered tires and glue in place.
Attach half pearls lace, and pearl trim on the cake you have assembled.
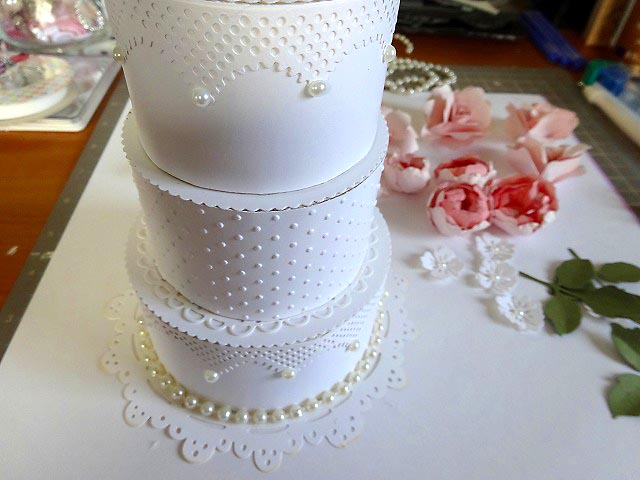
5
6. Glue the butterfly cake topper and ribbon .
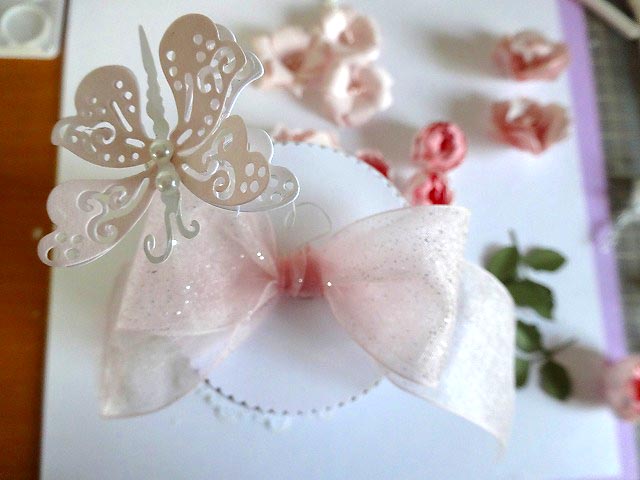
6
7. Glue the peony and the rose leaves and arrange berries and pearl stems.

7
8. Arrange flowers according to your taste balancing the whole cake. It’s complete!
Happy caking!
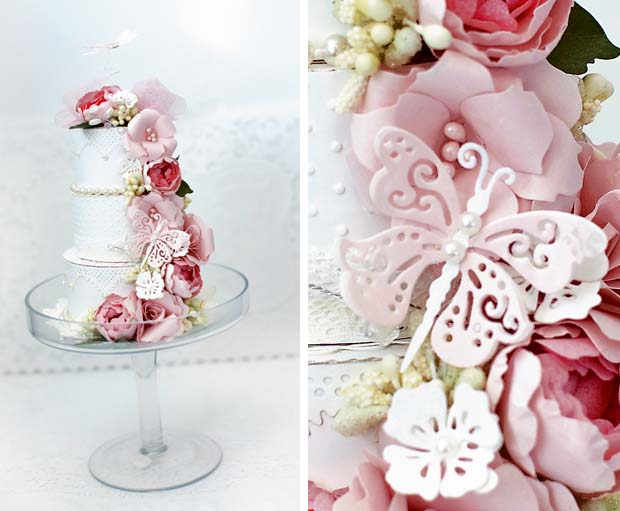
DooHickey Wedding Cake, By Yuri
Buatiful! Yes please hopefully you will post more.
Some template would be nice
Brilliant, love it, thank you for sharing!!
So creative,amazing detail and all really gorgeous . Thank you for the show and tell…very inspiring and helpful. hugs Lou.xx
OOO, This is a wonderful master class! thanks a lot! Waiting for new publications!
This is absolut stunning, and a really great tutorial, that I really think anyone can understand and use. Well don on a really outstanding piece of artwork here. It´s fabulous and sooo beautiful.
woo~~~~Amazing Simply stunning and breathtaking!
Hugs.jiwon
Oh my goodness, what a wonderful creation Yuri and thank you Magnolia for sharing this with us. Hugs xxxx
Superb
And thank u for ths grt step by step tutorial
Oh My Gosh!!!!!!!!!!!!! Yuri, this is so unbelievably beautiful!!!!!!!!!!! Thank you so much
Hugs